

 Tiếng Việt
User manual
Comprehensive Step-by-Step Guide on How to Use a RoHS 2.0 Compliance Tester
29
Jun
Jun
Comprehensive Step-by-Step Guide on How to Use a RoHS 2.0 Compliance Tester
The RoHS 2.0 directive (Directive 2011/65/EU) enforces strict limits on 10 hazardous substances in electrical and electronic equipment. While standard XRF spectrometers screen heavy metals, quantifying the four restricted phthalates—DEHP, BBP, DBP, and DIBP—requires advanced gas chromatography.
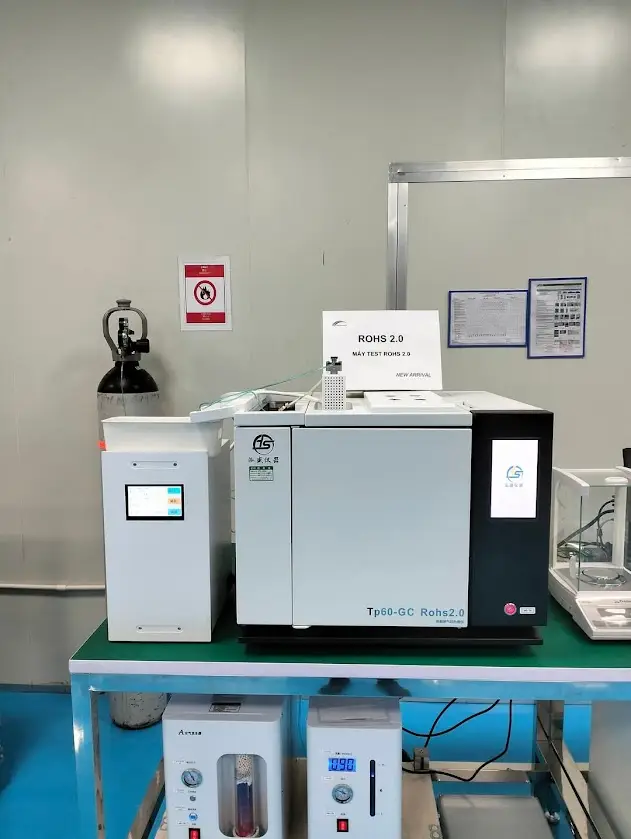
The TP-60 GC Py-GC system utilizes Pyrolysis-Gas Chromatography (Py-GC) and thermal desorption technology to deliver precise results. This comprehensive guide on how to use a RoHS 2.0 compliance tester covers system preparation, sample processing, software configuration, and routine maintenance to optimize performance.
1. Pre-Operational Setup for the RoHS 2.0 Tester
Before starting any analysis, operators must verify that the laboratory infrastructure and hardware meet specific technical requirements:
- Check Carrier Gas Supply: Ensure the carrier gas cylinders (high-purity Helium or Nitrogen at 99.999%) maintain steady pressure. Impurities in the gas line raise the background noise level on the chromatogram.
- Inspect the Pyrolyzer Chamber: Examine the quartz tube and the sample holder assembly. Remove any polymer residue or charred fragments left over from previous test cycles.
- Power On the System: Turn on the TP-60 GC unit, activate the control computer, and launch the dedicated chromatography software.
- Stabilize System Temperatures: Allow the system to idle for 30 to 45 minutes until the injection port (Inlet), column oven, and detector reach their designated baseline temperatures.
2. Operation Workflow for RoHS 2.0 Phthalate Analysis
Step 1: Sample Preparation (Plastics, Polymers, and Components)
Unlike conventional wet chemical testing, the TP-60 GC Py-GC employs direct thermal desorption. This method eliminates the need for toxic chemical solvents and tedious extraction procedures:
- Use a clean cutting tool or specialized laboratory mill to reduce the material (wire jackets, plastic housings, or connectors) into fine particles.
- Weigh the sample using an analytical balance accurate to 4 decimal places. The optimal target sample weight ranges strictly between 0.5 mg and 1.0 mg.
- Use precise laboratory tweezers to place the weighed sample into a clean, heat-resistant stainless steel or quartz sample cup.
Step 2: Programming the Heating Software
Configuring the temperature profile on the control software is critical for isolating the target phthalates without degrading the polymer matrix:
- Thermal Desorption Temperature: Program the pyrolyzer furnace to heat between 200°C and 350°C. This temperature range volatilizes the organic phthalate compounds into a gaseous state while leaving the polymer backbone intact.
- Column Oven Temperature Profile: Set a gradual heating ramp (for example: hold at 100°C for 1 minute, increase by 20°C/minute up to 300°C) to separate the individual chromatographic peaks of DIBP, DBP, BBP, and DEHP.
Step 3: Running the Sample Analysis
- Place the sample cup into the auto-shot sampler slot on top of the pyrolysis unit.
- Click the “Start” command within the software interface to trigger the mechanism that drops the sample cup into the heated zone.
- The carrier gas sweeps the vaporized phthalate molecules into the capillary column. The compounds separate based on their chemical properties and travel to the detector.
Step 4: Data Processing and RoHS 2.0 Reporting
- After the analysis cycle finishes (typically 20 to 30 minutes), the software generates a detailed chromatogram displaying signal peaks.
- The system automatically calculates the Peak Area for each identified compound and references a pre-established Calibration Curve to convert the data into parts per million (ppm or mg/kg).
- Compare the calculated concentrations against the official RoHS 2.0 regulatory threshold of 1000 ppm. Export the final analytical report as a secure PDF or spreadsheet file.
3. Maintenance Rules for Reliable Test Results
Regular maintenance prevents system contamination and minimizes data variance:
- Clean the Sample Cups: Burn off remaining residues in the sample cups using a laboratory torch or rinse them thoroughly with high-purity organic solvents before reuse.
- Replace Consumables Regularly: Change the injection port septum and glass wool liner every 50 to 100 sample injections to avoid pressure leaks and carryover contamination.
- Perform Periodic Calibrations: Run certified reference standard materials regularly to adjust the calibration curve and maintain instrument accuracy.
Conclusion
Following a proper guide on how to use a RoHS 2.0 compliance tester ensures that your facility can audit incoming components and outgoing electronics accurately. Correct sample preparation and precise temperature control protect against compliance errors, allowing products to pass international regulatory barriers seamlessly.